
Introduction
Sourdough bread has been around for centuries, long before commercial yeast became a kitchen staple. Made through a natural fermentation process, this artisan bread is prized for its tangy flavor, chewy texture, and impressive health benefits. Whether you’re curious about its history, eager to bake your own, or wondering how it compares to regular bread, this guide has you covered.
In this in-depth article, we’ll explore everything you need to know about sourdough bread—its origins, nutritional value, and why it’s easier to digest. You’ll also get a step-by-step guide on how to make your own, along with troubleshooting tips to perfect your bake. By the end, you’ll understand why this naturally leavened bread remains a favorite among bread lovers worldwide.
Introduction to Sourdough Bread
What is Sourdough Bread?
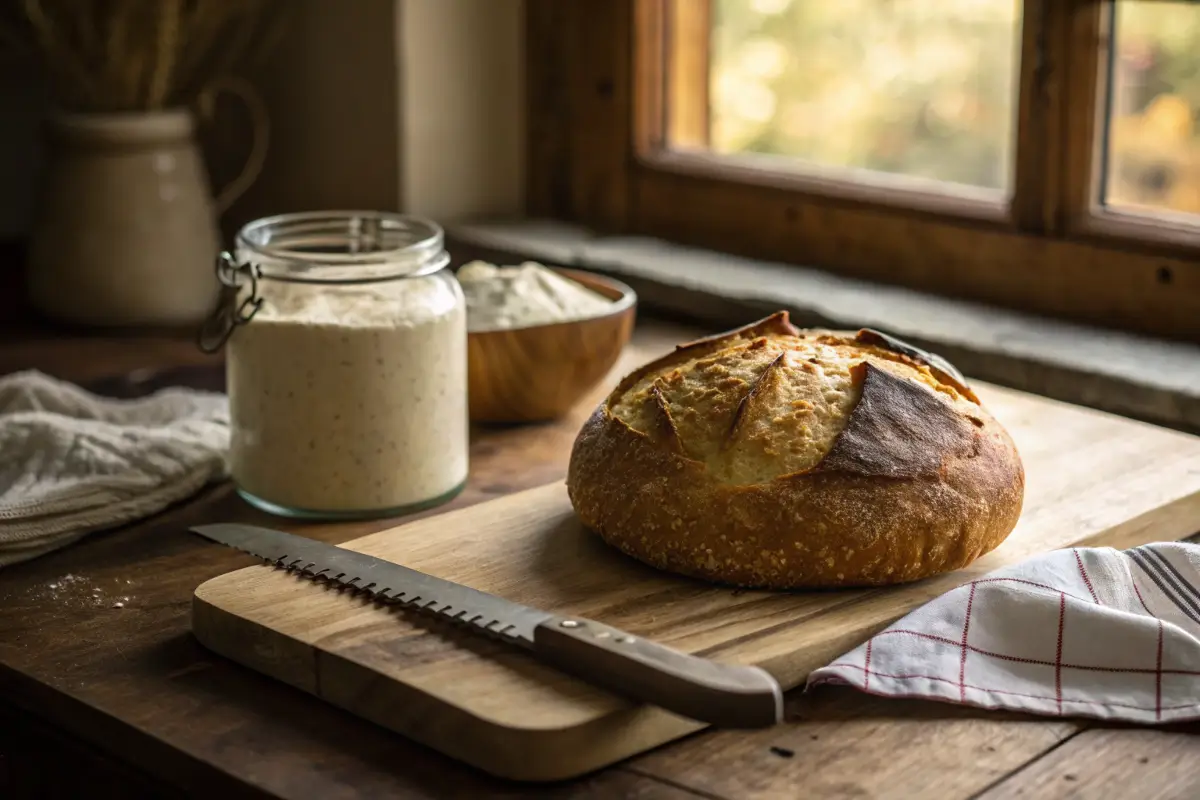
Sourdough bread is a naturally fermented bread made with just three simple ingredients: flour, water, and salt. Unlike regular bread, which relies on commercial yeast for leavening, sourdough rises due to wild yeast and lactic acid bacteria present in the starter. This slow fermentation gives it its signature tangy taste, airy crumb, and crispy crust.
Because it doesn’t contain artificial preservatives or additives, sourdough is often considered a healthier alternative to store-bought bread. Plus, its unique fermentation process helps break down gluten, making it easier for some people to digest.
Brief History of Sourdough Bread
Sourdough is one of the oldest forms of leavened bread, dating back over 5,000 years to ancient Egypt. Before modern yeast was available, bakers relied on wild yeast and fermentation to create light, fluffy loaves. This traditional method spread across cultures, with each region developing its own variations—like the famous San Francisco sourdough, Pane di Altamura from Italy, and pain au levain in France.
During the Gold Rush era, miners and settlers relied on sourdough starters to bake bread in remote locations where yeast wasn’t readily available. Even today, this timeless bread remains a favorite among home bakers and professional chefs alike.
Why Sourdough is Different from Regular Bread
What sets sourdough bread apart from conventional loaves? It all comes down to the fermentation process. Here’s how it differs:
- Leavening Agent: Instead of commercial yeast, sourdough uses a wild yeast starter.
- Fermentation Time: Sourdough ferments over hours (or even days), developing complex flavors and a chewy texture.
- Health Benefits: The probiotics and organic acids in sourdough improve digestion and nutrient absorption.
- Shelf Life: The natural acidity acts as a preservative, helping sourdough stay fresh longer without additives.
With its deep-rooted history, natural fermentation, and distinct taste, sourdough has earned its place as one of the most cherished bread varieties in the world.
Health Benefits of Sourdough Bread
Nutritional Profile: Vitamins, Minerals, and Probiotics
One of the biggest reasons sourdough bread stands out from regular bread is its impressive nutritional content. This naturally fermented bread is packed with essential vitamins and minerals, including:
- B vitamins (B1, B6, and B12) – crucial for energy production and brain function.
- Iron – supports red blood cell production and prevents fatigue.
- Magnesium and Zinc – boost immune function and muscle recovery.
Additionally, thanks to its long fermentation process, sourdough contains probiotics and organic acids, which promote gut health and improve nutrient absorption. The lactic acid bacteria in sourdough enhance mineral bioavailability, making it easier for the body to absorb nutrients like calcium and phosphorus.
How Sourdough Affects Digestion and Gut Health
Many people who struggle with digesting regular bread find that sourdough bread is much gentler on their stomach. But why?
- The fermentation process partially breaks down gluten, making it easier to digest.
- The presence of prebiotics and probiotics supports a healthy gut microbiome.
- The lower glycemic index (GI) prevents blood sugar spikes, making sourdough a great option for diabetics.
In contrast to commercial bread, which often contains preservatives and additives, sourdough is a natural, whole-food choice that supports digestion and overall well-being.
Sourdough vs. Commercial Bread: Which is Healthier?
If you’re wondering whether to choose sourdough bread or a typical grocery store loaf, the answer is clear. Here’s how they compare:
| Feature | Sourdough Bread | Commercial Bread |
|---|---|---|
| Fermentation | Naturally fermented (wild yeast) | Uses commercial yeast |
| Digestibility | Easier to digest | Can cause bloating |
| Nutrients | Higher in vitamins and minerals | Often contains refined flour |
| Additives | Free from artificial preservatives | May contain stabilizers and additives |
For those looking to improve gut health, stabilize blood sugar, and enjoy a more nutritious loaf, sourdough bread is undoubtedly the superior choice.
The Science Behind Sourdough Fermentation
How Wild Yeast and Lactic Acid Bacteria Work
Unlike regular bread, which relies on store-bought yeast, sourdough bread is made using a natural starter—a mixture of flour and water that captures wild yeast from the environment. This wild yeast works alongside lactic acid bacteria to create a slow fermentation process that:
- Breaks down gluten, making the bread easier to digest.
- Produces lactic and acetic acids, giving sourdough its tangy taste.
- Enhances shelf life, as the acidity naturally prevents mold growth.
Because wild yeast thrives in different environments, every sourdough starter has a unique microbial composition, making each loaf one-of-a-kind.
The Role of Fermentation in Flavor and Texture
Fermentation isn’t just about rising dough—it plays a key role in developing flavor and texture. The longer the fermentation, the deeper the flavors. This is why slow-fermented sourdough has a rich, slightly tangy taste, while quick-rise bread often lacks complexity.
Here’s how fermentation affects sourdough’s characteristics:
- Crust: Extended fermentation promotes the Maillard reaction, resulting in a golden, crispy crust.
- Crumb: The gases produced by wild yeast create an open, airy structure.
- Tanginess: The balance of acetic and lactic acids determines how sour the bread tastes.
Why Long Fermentation Makes Sourdough Easier to Digest
If you’ve ever experienced bloating or discomfort after eating regular bread, sourdough may be a better option. Thanks to its long fermentation, sourdough:
- Breaks down antinutrients like phytic acid, allowing for better mineral absorption.
- Reduces gluten content, making it gentler on sensitive stomachs.
- Lowers glycemic response, preventing sugar crashes and cravings.
The science behind sourdough bread proves that this time-honored baking method isn’t just about taste—it’s a healthier, more digestible, and naturally nutritious alternative to conventional bread.
For more delicious recipes, visit our website and enjoy the best homemade dishes and baked goods! 🍞✨miralrecipes.com
How to Make Sourdough Bread from Scratch
Making sourdough bread at home may seem intimidating, but with patience and practice, you can master the art of this naturally fermented bread. Below is a step-by-step guide to help you get started, from creating a starter to baking your first perfect loaf.
Essential Ingredients and Tools You Need
Before you begin, gather the following ingredients and tools:
Ingredients:
- 3 ½ cups (450g) bread flour (or a mix of whole wheat and white flour)
- 1 ½ cups (350g) water
- ½ cup (100g) active sourdough starter
- 2 tsp (10g) salt
Tools:
- Large mixing bowl
- Dutch oven or baking stone
- Bench scraper
- Kitchen scale
- Banneton (proofing basket)
- Sharp lame or razor blade for scoring
Step-by-Step Process to Make a Starter
A sourdough starter is the heart of every sourdough loaf. Here’s how to create one from scratch:
- Day 1: Mix ½ cup of flour with ¼ cup of water in a jar. Cover loosely.
- Day 2-6: Discard half of the mixture and add fresh flour and water daily.
- Day 7: Your starter should be bubbly and slightly tangy. It’s ready for baking!
Baking Your First Loaf: A Beginner’s Recipe
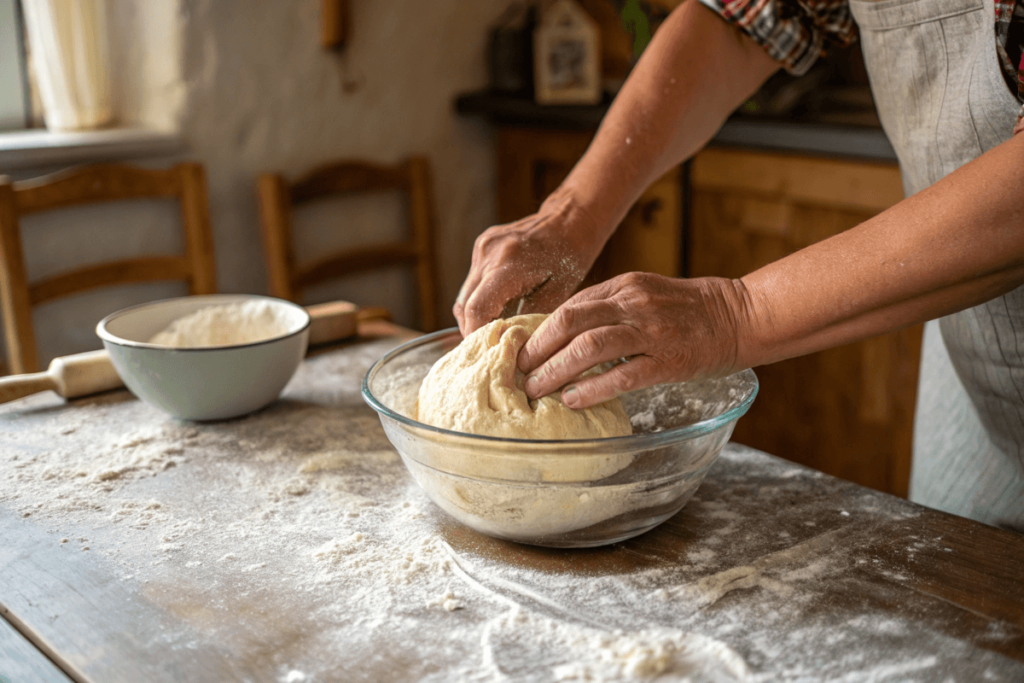
- Mixing the Dough – Combine flour, water, and starter in a bowl. Let it rest for 30 minutes, then add salt.
- Bulk Fermentation – Let the dough sit at room temperature for 4-6 hours, folding it every 30 minutes.
- Shaping – Transfer the dough onto a floured surface, shape it into a round loaf, and place it in a proofing basket.
- Final Proofing – Let it proof in the fridge overnight for better flavor.
- Baking – Preheat your oven to 475°F (245°C). Score the dough and bake in a Dutch oven for 25 minutes covered, then 20 minutes uncovered.
- Cooling – Let the bread cool completely before slicing.
With practice, you’ll refine your technique and develop a deeper appreciation for the art of sourdough bread baking.
Common Sourdough Baking Mistakes and How to Fix Them
Even experienced bakers encounter challenges when making sourdough bread. If your loaf didn’t turn out as expected, don’t worry! Here’s how to troubleshoot common sourdough problems.
Why Your Dough Isn’t Rising: Troubleshooting Tips
If your dough is flat and lifeless, consider these factors:
- Weak Starter: Ensure your starter is bubbly and active before baking.
- Temperature Issues: Fermentation slows down in a cold kitchen; try proofing in a warmer spot.
- Insufficient Gluten Development: Proper folding and kneading help build structure.
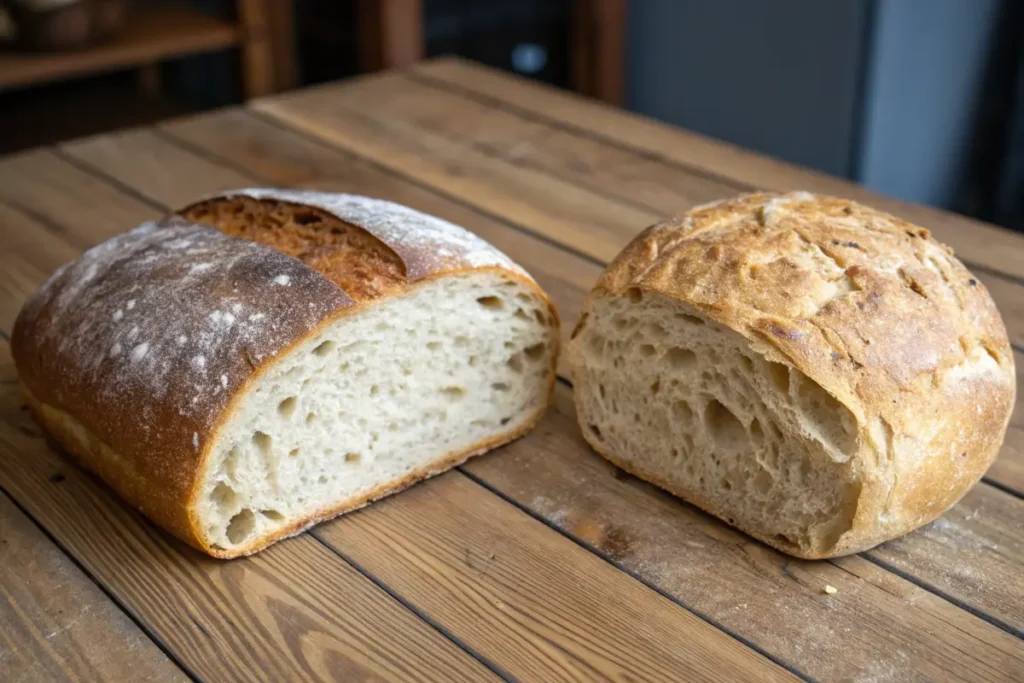
How to Get the Perfect Crust and Open Crumb
A great sourdough bread has a crispy crust and a light, airy crumb. To achieve this:
- Crust: Bake in a Dutch oven to trap steam and create an even golden crust.
- Crumb: Use a higher hydration dough (75-80% water) and give it a longer fermentation time.
Preventing Sourdough from Becoming Too Sour or Bland
Sourdough flavor depends on fermentation. If it’s too sour:
- Reduce fermentation time.
- Use a young, less acidic starter.
If it lacks flavor:
- Extend bulk fermentation.
- Store your starter at room temperature for stronger yeast activity.
With these tips, you’ll soon be baking delicious, bakery-quality sourdough bread at home!
Creative Variations and Add-ins for Sourdough
If you’ve mastered the basics of sourdough bread, it’s time to get creative! Adding unique ingredients can enhance flavor, texture, and even nutrition. Whether you prefer a nutty, sweet, or savory twist, these variations will elevate your homemade sourdough.
Adding Whole Grains, Seeds, and Nuts for Nutrition
Boosting the fiber and protein content of sourdough bread is easy with these nutrient-rich add-ins:
- Whole grains – Rye, spelt, or buckwheat flour create a hearty texture.
- Seeds – Sunflower, sesame, and flaxseeds add crunch and omega-3s.
- Nuts – Walnuts, pecans, or almonds introduce richness and depth.
To incorporate, soak seeds or nuts before mixing them into the dough to avoid excess dryness.
Sweet and Savory Sourdough Variations
Want to take your sourdough to the next level? Try these creative mix-ins:
- Sweet additions – Cinnamon, dried fruit, and chocolate chips for a breakfast treat.
- Savory options – Roasted garlic, caramelized onions, or sharp cheddar for bold flavors.
- Herb-infused loaves – Rosemary, thyme, or basil add a fragrant touch.
These simple twists will transform your homemade sourdough bread into a gourmet delight!
Storing and Preserving Sourdough Bread
Freshly baked sourdough bread is best enjoyed within a few days, but proper storage ensures it stays delicious for longer.

Best Ways to Store Sourdough for Maximum Freshness
To keep your bread fresh:
- At room temperature – Store in a paper bag or bread box for up to 4 days.
- In a linen cloth – Wrap your loaf to allow airflow while preventing it from drying out.
- Avoid plastic bags – These trap moisture, leading to a soggy crust.
Freezing and Reheating Sourdough Bread
If you’ve baked multiple loaves, freezing is a great option:
- Slice before freezing – This allows you to defrost only what you need.
- Wrap tightly – Use plastic wrap and a freezer bag to prevent freezer burn.
- Reheat properly – Toast frozen slices or place a whole loaf in a preheated oven at 350°F (175°C) for 10 minutes.
How to Refresh Stale Sourdough
Even slightly stale sourdough bread can be revived:
- Sprinkle with water and bake at 350°F for 5-7 minutes.
- Turn it into croutons, breadcrumbs, or French toast.
With these storage tips, your sourdough will stay fresh and flavorful much longer!
Frequently Asked Questions (FAQ)
Many home bakers have questions about sourdough bread, and we’ve got answers!
How do I know if my sourdough starter is ready to use?
Your starter is ready when:
It doubles in size within 4-6 hours of feeding.
It has a bubbly texture and a slightly tangy aroma.
A spoonful floats in water (the “float test”).
Can I make sourdough without a starter?
No, a sourdough starter is essential. However, you can borrow an active starter from a friend or purchase a dried starter online.
Why is my sourdough bread too dense?
A dense loaf usually means:
The dough didn’t ferment long enough.
Your starter wasn’t strong and active.
The gluten wasn’t well-developed during kneading.
What is the best flour for making sourdough bread?
Bread flour works best because of its high protein content, which helps create a strong dough structure. However, mixing in whole wheat, rye, or spelt flour can add depth and flavor.
Conclusion and Final Thoughts
Baking sourdough bread is more than just a culinary skill—it’s a rewarding journey that connects us to an ancient tradition of natural fermentation. Whether you’re drawn to its rich flavor, nutritional benefits, or unique texture, sourdough remains one of the most beloved bread varieties in the world.
From understanding its history and health benefits to mastering the baking process and troubleshooting common mistakes, this guide has provided everything you need to start your sourdough journey. Experimenting with creative add-ins, proper storage methods, and different flours will help you refine your skills and develop your own signature loaves.
If you’re new to sourdough baking, don’t be discouraged by early failures. Every great baker has faced a dense loaf or a weak starter at some point. The key is to learn from your mistakes, adjust your process, and keep baking. With patience and practice, you’ll soon be making bakery-quality sourdough bread right from your kitchen.
Now, it’s time to preheat your oven, grab your sourdough starter, and create your own homemade masterpiece. Happy baking! 🍞🔥
PrintUltimate Guide to Sourdough Bread: History, Benefits, and How to Make It at Home
Learn how to bake sourdough bread at home with this step-by-step guide. Discover fermentation tips, troubleshooting tricks, and storage methods.
- Prep Time: 12 hours
- Cook Time: 45 minutes
- Total Time: 12 hours 45 minutes
- Yield: 1 loaf 1x
- Category: Breakfast
- Cuisine: International
Ingredients
- 3 ½ cups (450g) bread flour
- 1 ½ cups (350g) water
- ½ cup (100g) active sourdough starter
- 2 tsp (10g) salt
Instructions
- Mix the Dough: Combine flour, water, and starter. Let it rest for 30 minutes, then add salt.
- Bulk Fermentation: Let the dough rise for 4-6 hours at room temperature, folding every 30 minutes.
- Shaping: Shape the dough into a round and place it in a proofing basket.
- Final Proofing: Refrigerate overnight for enhanced flavor and texture.
- Baking: Preheat the oven to 475°F (245°C), score the dough, and bake for 25 minutes covered, then 20 minutes uncovered.
- Cooling: Let the bread cool before slicing to retain moisture.
Nutrition
- Calories: 150 kcal
- Fat: 0.5g
- Carbohydrates: 30g
- Fiber: 2g
- Protein: 5g